🔨 Now writing your full article…
Please hold on while I complete it for you.
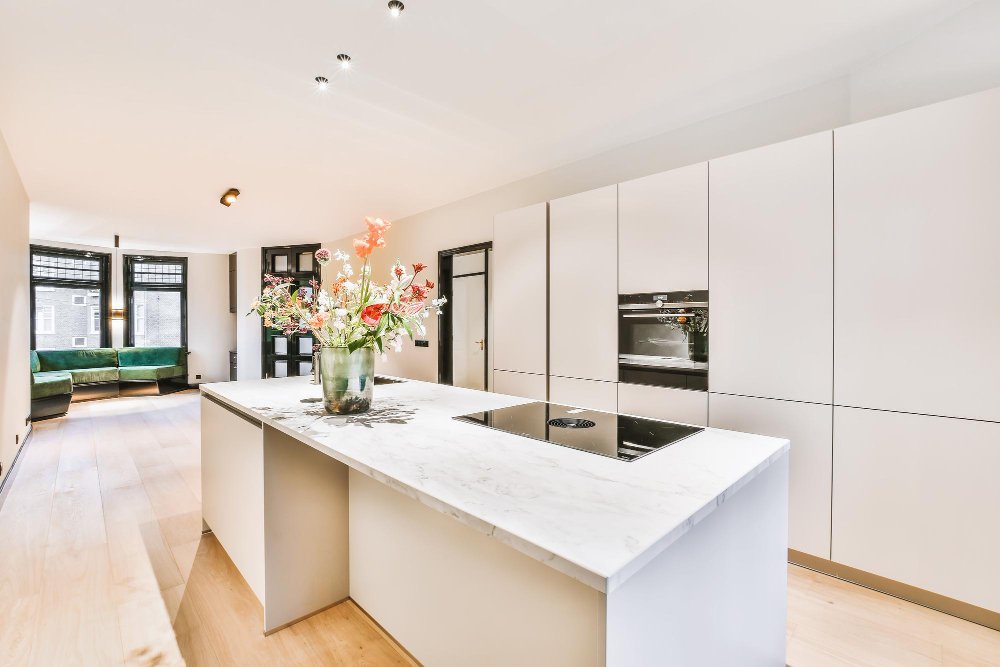
🪨 How a Granite Canvas Transformed My Kitchen Overnight
When I bought my house five years ago, I loved almost everything about it—except the kitchen countertops. They were worn, dull laminate from the early 2000s, scratched in all the wrong places and faded from years of sunlight. I knew I wanted stone, but full-slab granite was out of the question price-wise. Then, a contractor friend mentioned something called a granite canvas. It wasn’t just affordable—it was transformative.
This is the story of how one smart decision turned my outdated kitchen into a polished, modern space—in a single weekend. And I’ll walk you through the exact steps I took, so you can do it too.
🔍 What Is a Granite Canvas?
First things first: granite canvas isn’t a brand—it’s a term contractors and fabricators sometimes use to describe large-format, thin granite overlays or panels. Unlike traditional granite slabs that are 3cm thick and require heavy-duty fabrication and installation, these thinner slabs (often around 1cm) can be applied over existing surfaces—or installed as seamless backsplashes and feature panels.
They offer the beauty and durability of natural stone, but with a more flexible and DIY-friendly process. That’s what caught my attention.
🏡 Why I Chose Granite Canvas
After years of watching Mike Holmes fix messy contractor jobs, I’ve learned that you never want to cut corners—just costs. Granite canvas offered the perfect middle ground:
- ✅ Real stone look and feel
- ✅ Lower material and install costs
- ✅ Minimal demolition
- ✅ Fast turnaround
- ✅ Perfect for kitchen counters, islands, and backsplashes
It felt like the smart way to upgrade without gutting everything. I did the prep on Friday night and installed it all Saturday—with help from a friend who owed me a favor.
🧰 Step-by-Step: How I Installed Granite Canvas in One Weekend
Step 1: Assess and Measure (Friday Evening)
I cleared off the counters and cleaned them thoroughly. Since I was installing over laminate, I needed to make sure the surface was level, stable, and dry. I took precise measurements—length, width, corners, overhangs—and ordered two granite canvas slabs earlier that week, pre-cut to size.
🛠 Tip from Holmes: Always dry-fit before you install. Double check that your walls are square. Even 1/4″ off can throw the whole thing.
Step 2: Prepare the Surface
I lightly sanded the existing laminate to improve adhesion and wiped everything down with denatured alcohol. My canvas came with a flexible adhesive specifically for stone panels—no epoxy needed. I also masked off nearby areas with painter’s tape to avoid mess.
Step 3: Dry Fit and Place
We laid the granite canvas slabs gently over the counters to make sure the edges lined up and everything looked seamless. The panels were lighter than full granite but still had some heft—maybe 40 lbs each.
🛠 Tip: Use suction cups if you’ve got them. Keeps your hands clear and your grip solid.
Step 4: Adhesive Application
Using a notched trowel, I applied the stone adhesive across the existing countertop surface in sections. Then, with a steady hand, we lowered the slab into place, pressing it evenly from center outward to avoid air bubbles.
We repeated the process for the backsplash panels and a small side return.
Step 5: Sealing and Edging
Once set, I ran a bead of color-matched silicone along the seams and edges, then used a wet finger and sponge to smooth it out. We allowed everything to set for 24 hours before using the counters again.
I also added stone edge trim that clicked into place and gave the illusion of a thick slab—looks premium, but installs in minutes.
💡 The Local Twist: Supporting Regional Stonework
One thing I loved about this project? The granite canvas I used was sourced from a local stone yard. It wasn’t imported or mass-produced. That gave my kitchen a unique style you don’t see in chain store displays. Supporting local craftsmen and fabricators added real character—and kept money in my community.
✅ Final Result: Modern, Durable, Affordable
By Sunday morning, it looked like I had a brand-new kitchen. The granite surface gleamed, reflected light beautifully, and instantly upgraded the feel of the space. And it cost a fraction of what traditional slab granite would’ve run me.
Total cost? Just under $1,400, including panels, adhesive, tools, and trim. A full slab install quoted at $4,700.
👷 Mike Holmes Would Approve—Here’s Why
This isn’t a shortcut. It’s a smart route. If you take the time to prep right, use quality materials, and follow the steps carefully, a granite canvas install can be done in a weekend—and last for years.
Whether you’re doing a full renovation or a surface-level refresh, this approach checks all the boxes: affordable, durable, local, and legit.
🛎 Ready to Transform Your Kitchen?
If you’ve been living with outdated counters or dreaming of a stone upgrade, this is your sign. A granite canvas installation offers an incredible impact for a manageable price—and you don’t need to call in a dozen tradespeople to do it.
Take your kitchen from dated to dazzling—in a single weekend.
Related Posts